|
OpenCV
4.5.1
Open Source Computer Vision
|
|
OpenCV
4.5.1
Open Source Computer Vision
|
Prev Tutorial: Histogram Equalization
Next Tutorial: Histogram Comparison
| Original author | Ana Huamán |
| Compatibility | OpenCV >= 3.0 |
In this tutorial you will learn how to:
Let's see an example. Imagine that a Matrix contains information of an image (i.e. intensity in the range \(0-255\)):
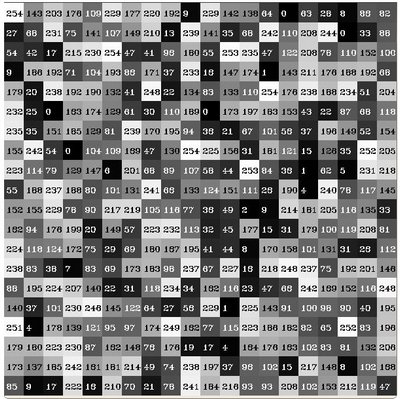
What happens if we want to count this data in an organized way? Since we know that the range of information value for this case is 256 values, we can segment our range in subparts (called bins) like:
\[\begin{array}{l} [0, 255] = { [0, 15] \cup [16, 31] \cup ....\cup [240,255] } \\ range = { bin_{1} \cup bin_{2} \cup ....\cup bin_{n = 15} } \end{array}\]
and we can keep count of the number of pixels that fall in the range of each \(bin_{i}\). Applying this to the example above we get the image below ( axis x represents the bins and axis y the number of pixels in each of them).

For simple purposes, OpenCV implements the function cv::calcHist , which calculates the histogram of a set of arrays (usually images or image planes). It can operate with up to 32 dimensions. We will see it in the code below!
our input is the image to be divided (this case with three channels) and the output is a vector of Mat )
we use the expression (C++ code):
where \(i\) indicates the dimension. If it were a 2D-histogram we would use something like:
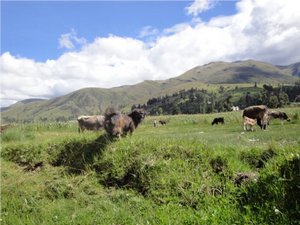
Using as input argument an image like the one shown below:
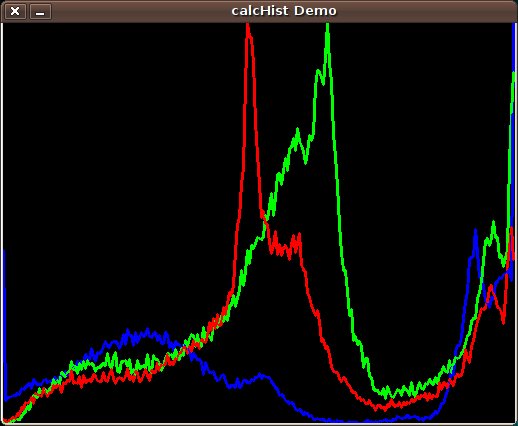
Produces the following histogram:
 1.8.13