

High Dynamic Range Imaging#
Introduction#
Today most digital images and imaging devices use 8 bits per channel thus limiting the dynamic range of the device to two orders of magnitude (actually 256 levels), while human eye can adapt to lighting conditions varying by ten orders of magnitude. When we take photographs of a real world scene bright regions may be overexposed, while the dark ones may be underexposed, so we can’t capture all details using a single exposure. HDR imaging works with images that use more that 8 bits per channel (usually 32-bit float values), allowing much wider dynamic range.
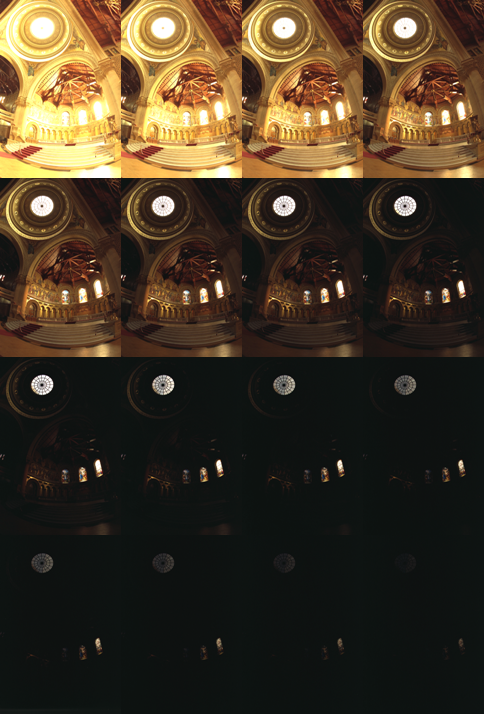
There are different ways to obtain HDR images, but the most common one is to use photographs of the scene taken with different exposure values. To combine this exposures it is useful to know your camera’s response function and there are algorithms to estimate it. After the HDR image has been blended it has to be converted back to 8-bit to view it on usual displays. This process is called tonemapping. Additional complexities arise when objects of the scene or camera move between shots, since images with different exposures should be registered and aligned.
In this tutorial we show how to generate and display HDR image from an exposure sequence. In our case images are already aligned and there are no moving objects. We also demonstrate an alternative approach called exposure fusion that produces low dynamic range image. Each step of HDR pipeline can be implemented using different algorithms so take a look at the reference manual to see them all.
Exposure sequence#
Source Code#
This tutorial code’s is shown lines below. You can also download it from here
#include "opencv2/photo.hpp"
#include "opencv2/imgcodecs.hpp"
#include "opencv2/highgui.hpp"

#include <vector>
#include <iostream>
#include <fstream>

using namespace cv;
using namespace std;

void loadExposureSeq(String, vector<Mat>&, vector<float>&);

int main(int argc, char**argv)
{
    CommandLineParser parser( argc, argv, "{@input | | Input directory that contains images and exposure times. }" );

    vector<Mat> images;
    vector<float> times;
    loadExposureSeq(parser.get<String>( "@input" ), images, times);

    Mat response;
    Ptr<CalibrateDebevec> calibrate = createCalibrateDebevec();
    calibrate->process(images, response, times);

    Mat hdr;
    Ptr<MergeDebevec> merge_debevec = createMergeDebevec();
    merge_debevec->process(images, hdr, times, response);

    Mat ldr;
    Ptr<TonemapDrago> tonemap = createTonemapDrago(2.2f);
    tonemap->process(hdr, ldr);

    Mat fusion;
    Ptr<MergeMertens> merge_mertens = createMergeMertens();
    merge_mertens->process(images, fusion);

    imwrite("fusion.png", fusion * 255);
    imwrite("ldr.png", ldr * 255);
    imwrite("hdr.hdr", hdr);

    return 0;
}

void loadExposureSeq(String path, vector<Mat>& images, vector<float>& times)
{
    path = path + "/";
    ifstream list_file((path + "list.txt").c_str());
    string name;
    float val;
    while(list_file >> name >> val) {
        Mat img = imread(path + name);
        images.push_back(img);
        times.push_back(1 / val);
    }
    list_file.close();
}
This tutorial code’s is shown lines below. You can also download it from here
import java.io.IOException;
import java.nio.file.Files;
import java.nio.file.Paths;
import java.util.ArrayList;
import java.util.List;

import org.opencv.core.Core;
import org.opencv.core.CvType;
import org.opencv.core.Mat;
import org.opencv.core.Scalar;
import org.opencv.imgcodecs.Imgcodecs;
import org.opencv.photo.CalibrateDebevec;
import org.opencv.photo.MergeDebevec;
import org.opencv.photo.MergeMertens;
import org.opencv.photo.Photo;
import org.opencv.photo.Tonemap;

class HDRImaging {
    public void loadExposureSeq(String path, List<Mat> images, List<Float> times) {
        path += "/";

        List<String> lines;
        try {
            lines = Files.readAllLines(Paths.get(path + "list.txt"));

            for (String line : lines) {
                String[] splitStr = line.split("\\s+");
                if (splitStr.length == 2) {
                    String name = splitStr[0];
                    Mat img = Imgcodecs.imread(path + name);
                    images.add(img);
                    float val = Float.parseFloat(splitStr[1]);
                    times.add(1/ val);
                }
            }
        } catch (IOException e) {
            e.printStackTrace();
        }
    }

    public void run(String[] args) {
        String path = args.length > 0 ? args[0] : "";
        if (path.isEmpty()) {
            System.out.println("Path is empty. Use the directory that contains images and exposure times.");
            System.exit(0);
        }

        List<Mat> images = new ArrayList<>();
        List<Float> times = new ArrayList<>();
        loadExposureSeq(path, images, times);

        Mat response = new Mat();
        CalibrateDebevec calibrate = Photo.createCalibrateDebevec();
        Mat matTimes = new Mat(times.size(), 1, CvType.CV_32F);
        float[] arrayTimes = new float[(int) (matTimes.total()*matTimes.channels())];
        for (int i = 0; i < times.size(); i++) {
            arrayTimes[i] = times.get(i);
        }
        matTimes.put(0, 0, arrayTimes);
        calibrate.process(images, response, matTimes);

        Mat hdr = new Mat();
        MergeDebevec mergeDebevec = Photo.createMergeDebevec();
        mergeDebevec.process(images, hdr, matTimes);

        Mat ldr = new Mat();
        Tonemap tonemap = Photo.createTonemap(2.2f);
        tonemap.process(hdr, ldr);

        Mat fusion = new Mat();
        MergeMertens mergeMertens = Photo.createMergeMertens();
        mergeMertens.process(images, fusion);

        Core.multiply(fusion, new Scalar(255,255,255), fusion);
        Core.multiply(ldr, new Scalar(255,255,255), ldr);
        Imgcodecs.imwrite("fusion.png", fusion);
        Imgcodecs.imwrite("ldr.png", ldr);
        Imgcodecs.imwrite("hdr.hdr", hdr);

        System.exit(0);
    }
}

public class HDRImagingDemo {
    public static void main(String[] args) {
        // Load the native OpenCV library
        System.loadLibrary(Core.NATIVE_LIBRARY_NAME);

        new HDRImaging().run(args);
    }
}
This tutorial code’s is shown lines below. You can also download it from here
from __future__ import print_function
from __future__ import division
import cv2 as cv
import numpy as np
import argparse
import os

def loadExposureSeq(path):
    images = []
    times = []
    with open(os.path.join(path, 'list.txt')) as f:
        content = f.readlines()
    for line in content:
        tokens = line.split()
        images.append(cv.imread(os.path.join(path, tokens[0])))
        times.append(1 / float(tokens[1]))

    return images, np.asarray(times, dtype=np.float32)

parser = argparse.ArgumentParser(description='Code for High Dynamic Range Imaging tutorial.')
parser.add_argument('--input', type=str, help='Path to the directory that contains images and exposure times.')
args = parser.parse_args()

if not args.input:
    parser.print_help()
    exit(0)

images, times = loadExposureSeq(args.input)

calibrate = cv.createCalibrateDebevec()
response = calibrate.process(images, times)

merge_debevec = cv.createMergeDebevec()
hdr = merge_debevec.process(images, times, response)

tonemap = cv.createTonemapDrago(2.2)
ldr = tonemap.process(hdr)

merge_mertens = cv.createMergeMertens()
fusion = merge_mertens.process(images)

cv.imwrite('fusion.png', fusion * 255)
cv.imwrite('ldr.png', ldr * 255)
cv.imwrite('hdr.hdr', hdr)
Sample images#
Data directory that contains images, exposure times and list.txt file can be downloaded from
here.
Explanation#
Load images and exposure times
List<Mat> images = new ArrayList<>();
List<Float> times = new ArrayList<>();
loadExposureSeq(path, images, times);
images, times = loadExposureSeq(args.input)
Firstly we load input images and exposure times from user-defined folder. The folder should contain images and list.txt - file that contains file names and inverse exposure times.
For our image sequence the list is following:
memorial00.png 0.03125
memorial01.png 0.0625
...
memorial15.png 1024
Estimate camera response
Mat response;
Ptr<CalibrateDebevec> calibrate = createCalibrateDebevec();
calibrate->process(images, response, times);
Mat response = new Mat();
CalibrateDebevec calibrate = Photo.createCalibrateDebevec();
Mat matTimes = new Mat(times.size(), 1, CvType.CV_32F);
float[] arrayTimes = new float[(int) (matTimes.total()*matTimes.channels())];
for (int i = 0; i < times.size(); i++) {
    arrayTimes[i] = times.get(i);
}
matTimes.put(0, 0, arrayTimes);
calibrate.process(images, response, matTimes);
calibrate = cv.createCalibrateDebevec()
response = calibrate.process(images, times)
It is necessary to know camera response function (CRF) for a lot of HDR construction algorithms. We use one of the calibration algorithms to estimate inverse CRF for all 256 pixel values.
Make HDR image
Mat hdr;
Ptr<MergeDebevec> merge_debevec = createMergeDebevec();
merge_debevec->process(images, hdr, times, response);
Mat hdr = new Mat();
MergeDebevec mergeDebevec = Photo.createMergeDebevec();
mergeDebevec.process(images, hdr, matTimes);
merge_debevec = cv.createMergeDebevec()
hdr = merge_debevec.process(images, times, response)
We use Debevec’s weighting scheme to construct HDR image using response calculated in the previous item.
Tonemap HDR image
Mat ldr;
Ptr<TonemapDrago> tonemap = createTonemapDrago(2.2f);
tonemap->process(hdr, ldr);
tonemap = cv.createTonemapDrago(2.2)
ldr = tonemap.process(hdr)
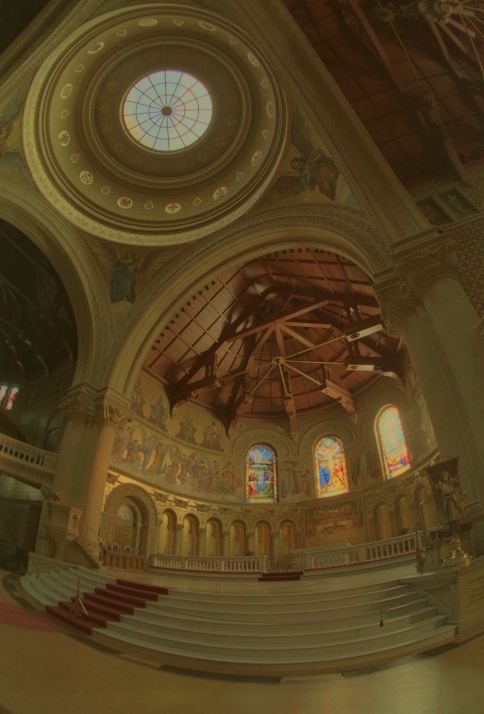
Since we want to see our results on common LDR display we have to map our HDR image to 8-bit range preserving most details. It is the main goal of tonemapping methods. We use tonemapper with bilateral filtering and set 2.2 as the value for gamma correction.
Perform exposure fusion
Mat fusion;
Ptr<MergeMertens> merge_mertens = createMergeMertens();
merge_mertens->process(images, fusion);
Mat fusion = new Mat();
MergeMertens mergeMertens = Photo.createMergeMertens();
mergeMertens.process(images, fusion);
merge_mertens = cv.createMergeMertens()
fusion = merge_mertens.process(images)
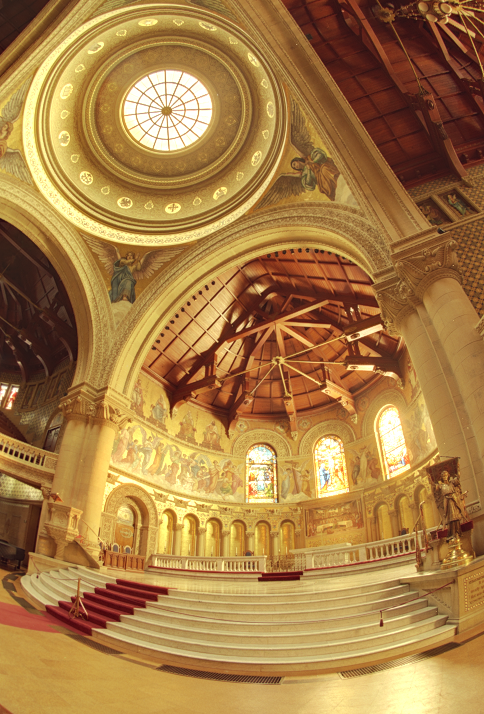
There is an alternative way to merge our exposures in case when we don’t need HDR image. This process is called exposure fusion and produces LDR image that doesn’t require gamma correction. It also doesn’t use exposure values of the photographs.
Write results
Now it’s time to look at the results. Note that HDR image can’t be stored in one of common image formats, so we save it to Radiance image (.hdr). Also all HDR imaging functions return results in [0, 1] range so we should multiply result by 255.
You can try other tonemap algorithms: cv::TonemapDrago, cv::TonemapMantiuk and cv::TonemapReinhard You can also adjust the parameters in the HDR calibration and tonemap methods for your own photos.
Results#
Tonemapped image#
Exposure fusion#
Additional Resources#
Paul E Debevec and Jitendra Malik. Recovering high dynamic range radiance maps from photographs. In ACM SIGGRAPH 2008 classes, page 31. ACM, 2008. [76]
Mark A Robertson, Sean Borman, and Robert L Stevenson. Dynamic range improvement through multiple exposures. In Image Processing, 1999. ICIP 99. Proceedings. 1999 International Conference on, volume 3, pages 159–163. IEEE, 1999. [252]
Tom Mertens, Jan Kautz, and Frank Van Reeth. Exposure fusion. In Computer Graphics and Applications, 2007. PG’07. 15th Pacific Conference on, pages 382–390. IEEE, 2007. [210]
Recovering High Dynamic Range Radiance Maps from Photographs (webpage)