

Add a Trackbar to Your Application#
Goal#
Use HTML DOM Input Range Object to add a trackbar to your application.
Code Demo#
Here, we will create a simple application that blends two images. We will let the user enter the weight by using the trackbar.
First, we need to create three canvas elements: two for input and one for output. Please refer to the tutorial Getting Started with Images.
let src1 = cv.imread('canvasInput1');
let src2 = cv.imread('canvasInput2');
Then, we use HTML DOM Input Range Object to implement the trackbar, which is shown as below.
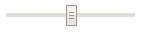
Note
<input> elements with type=“range” are not supported in Internet Explorer 9 and earlier versions.
You can create an <input> element with type=“range” with the document.createElement() method:
let x = document.createElement('INPUT');
x.setAttribute('type', 'range');
You can access an <input> element with type=“range” with getElementById():
let x = document.getElementById('myRange');
As a trackbar, the range element need a trackbar name, the default value, minimum value, maximum value, step and the callback function which is executed every time trackbar value changes. The callback function always has a default argument, which is the trackbar position. Additionally, a text element to display the trackbar value is fine. In our case, we can create the trackbar as below:
Finally, we can use the trackbar value in the callback function, blend the two images, and display the result.
let weightValue = document.getElementById('weightValue');
let trackbar = document.getElementById('trackbar');
weightValue.setAttribute('value', trackbar.value);
let alpha = trackbar.value/trackbar.max;
let beta = ( 1.0 - alpha );
let src1 = cv.imread('canvasInput1');
let src2 = cv.imread('canvasInput2');
let dst = new cv.Mat();
cv.addWeighted( src1, alpha, src2, beta, 0.0, dst, -1);
cv.imshow('canvasOutput', dst);
dst.delete();
src1.delete();
src2.delete();
See also