|
OpenCV
4.5.5
Open Source Computer Vision
|
|
OpenCV
4.5.5
Open Source Computer Vision
|
Prev Tutorial: Introduction to Java Development
Next Tutorial: Introduction to OpenCV Development with Clojure
| Original author | Barış Evrim Demiröz |
| Compatibility | OpenCV >= 3.0 |
Since version 2.4.4 OpenCV supports Java. In this tutorial I will explain how to setup development environment for using OpenCV Java with Eclipse in Windows, so you can enjoy the benefits of garbage collected, very refactorable (rename variable, extract method and whatnot) modern language that enables you to write code with less effort and make less mistakes. Here we go.
First, obtain a fresh release of OpenCV from download page and extract it under a simple location like C:\OpenCV-2.4.6\. I am using version 2.4.6, but the steps are more or less the same for other versions.
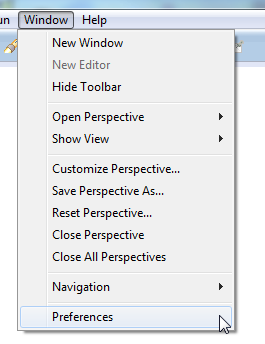
Now, we will define OpenCV as a user library in Eclipse, so we can reuse the configuration for any project. Launch Eclipse and select Window –> Preferences from the menu.
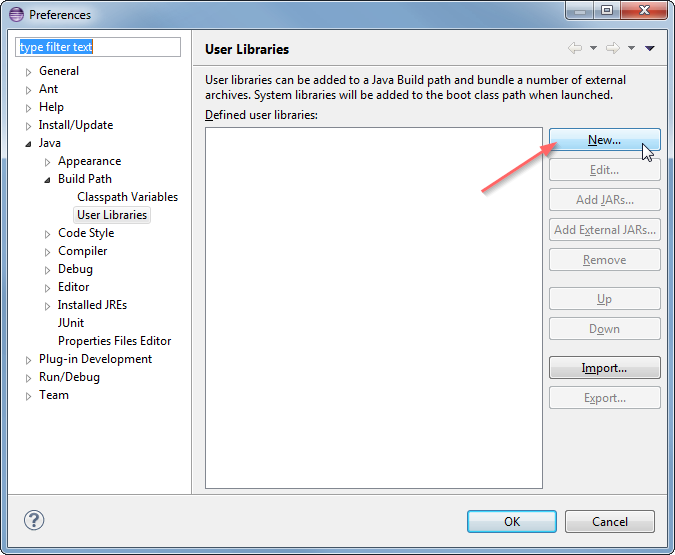
Navigate under Java –> Build Path –> User Libraries and click New....
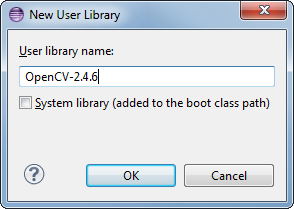
Enter a name, e.g. OpenCV-2.4.6, for your new library.
Now select your new user library and click Add External JARs....

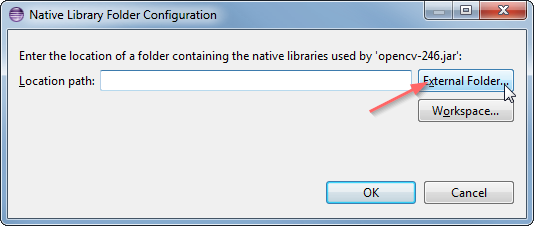
Browse through C:\OpenCV-2.4.6\build\java\ and select opencv-246.jar. After adding the jar, extend the opencv-246.jar and select Native library location and press Edit....
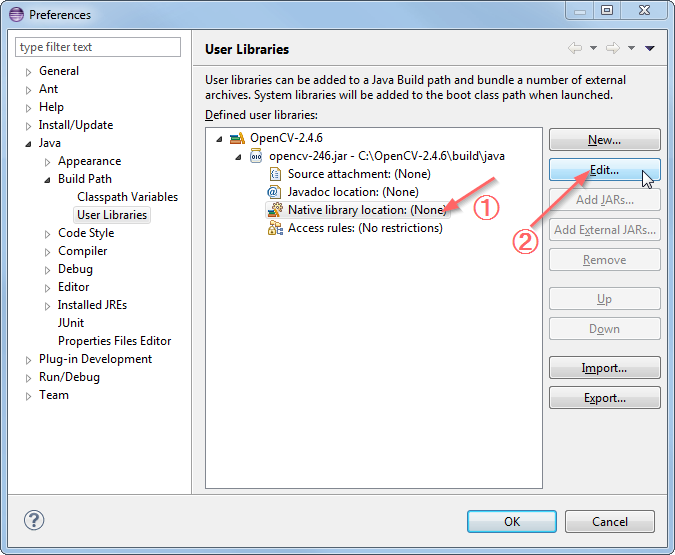
Select External Folder... and browse to select the folder C:\OpenCV-2.4.6\build\java\x64. If you have a 32-bit system you need to select the x86 folder instead of x64.
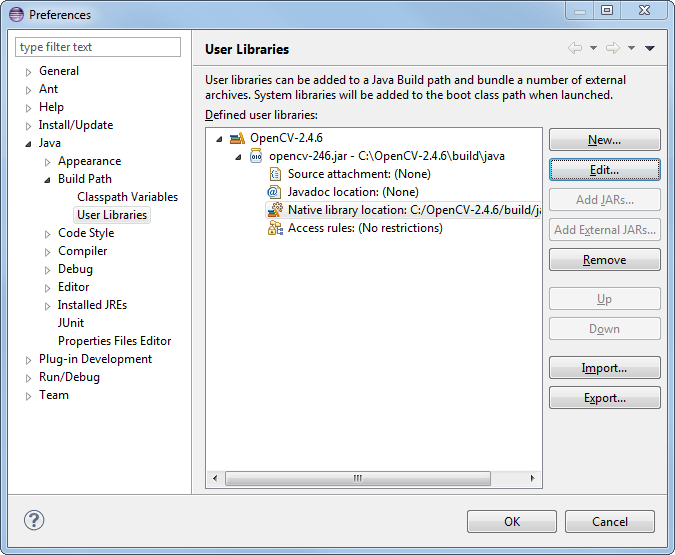
Your user library configuration should look like this:
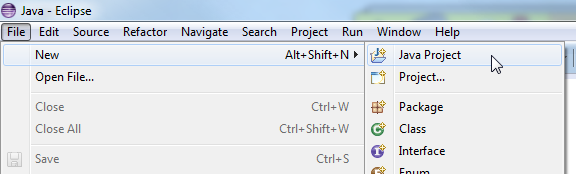
Now start creating a new Java project.
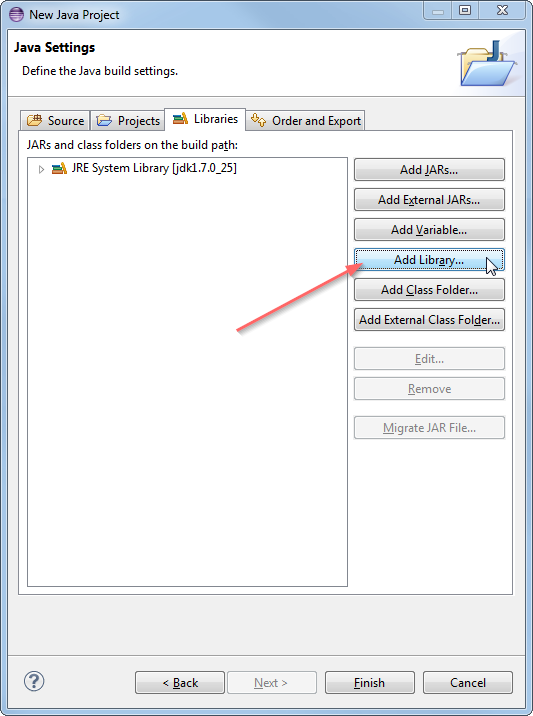
On the Java Settings step, under Libraries tab, select Add Library... and select OpenCV-2.4.6, then click Finish.
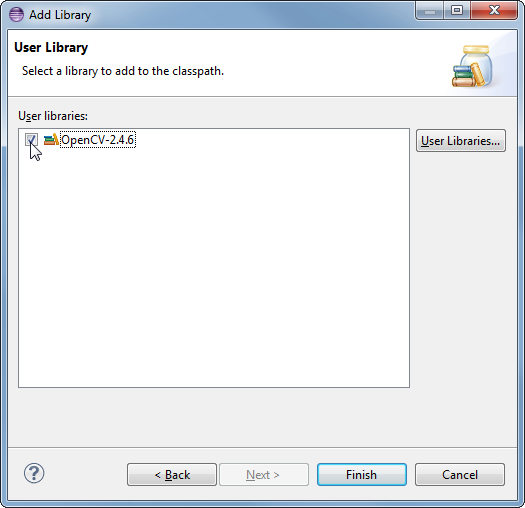
Libraries should look like this:

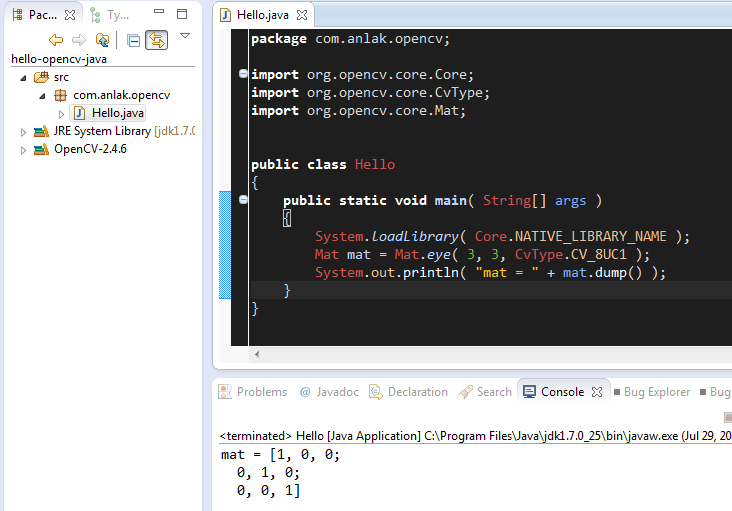
Now you have created and configured a new Java project it is time to test it. Create a new java file. Here is a starter code for your convenience:
When you run the code you should see 3x3 identity matrix as output.
That is it, whenever you start a new project just add the OpenCV user library that you have defined to your project and you are good to go. Enjoy your powerful, less painful development environment :)
You may get the following error (e.g. on Ubuntu) if you have built OpenCV with MKL library with some Java code that calls OpenCV functions that use Intel MKL:
Intel MKL FATAL ERROR: Cannot load libmkl_avx2.so or libmkl_def.so.
One solution to solve this on Linux consists in preloading the Intel MKL library (either run the command in a terminal or add it to your .bashrc file). Your command line should be something similar to this (add $LD_PRELOAD: before if you have already set the LD_PRELOAD variable):
export LD_PRELOAD=/opt/intel/mkl/lib/intel64/libmkl_core.so:/opt/intel/mkl/lib/intel64/libmkl_sequential.so
Then, run the Eclipse IDE from a terminal that have this environment variable set (echo $LD_PRELOAD) and the error should disappear.
 1.8.13