 |
OpenCV
4.1.2
Open Source Computer Vision
|
 |
OpenCV
4.1.2
Open Source Computer Vision
|
Prev Tutorial: Remapping
Next Tutorial: Histogram Equalization
In this tutorial you will learn how to:
From the above, we can use an Affine Transformation to express:
you can see that, in essence, an Affine Transformation represents a relation between two images.
The usual way to represent an Affine Transformation is by using a \(2 \times 3\) matrix.
\[ A = \begin{bmatrix} a_{00} & a_{01} \\ a_{10} & a_{11} \end{bmatrix}_{2 \times 2} B = \begin{bmatrix} b_{00} \\ b_{10} \end{bmatrix}_{2 \times 1} \]
\[ M = \begin{bmatrix} A & B \end{bmatrix} = \begin{bmatrix} a_{00} & a_{01} & b_{00} \\ a_{10} & a_{11} & b_{10} \end{bmatrix}_{2 \times 3} \]
Considering that we want to transform a 2D vector \(X = \begin{bmatrix}x \\ y\end{bmatrix}\) by using \(A\) and \(B\), we can do the same with:
\(T = A \cdot \begin{bmatrix}x \\ y\end{bmatrix} + B\) or \(T = M \cdot [x, y, 1]^{T}\)
\[T = \begin{bmatrix} a_{00}x + a_{01}y + b_{00} \\ a_{10}x + a_{11}y + b_{10} \end{bmatrix}\]
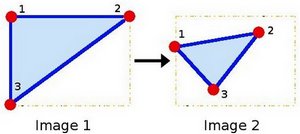
Let's explain this in a better way (b). Since \(M\) relates 2 images, we can analyze the simplest case in which it relates three points in both images. Look at the figure below:

the points 1, 2 and 3 (forming a triangle in image 1) are mapped into image 2, still forming a triangle, but now they have changed notoriously. If we find the Affine Transformation with these 3 points (you can choose them as you like), then we can apply this found relation to all the pixels in an image.
You may want to draw these points to get a better idea on how they change. Their locations are approximately the same as the ones depicted in the example figure (in the Theory section). You may note that the size and orientation of the triangle defined by the 3 points change.
We get a \(2 \times 3\) matrix as an output (in this case warp_mat)
with the following arguments:
We just got our first transformed image! We will display it in one bit. Before that, we also want to rotate it...
Rotate: To rotate an image, we need to know two things:
We define these parameters with the following snippet:
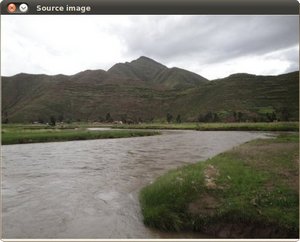
After compiling the code above, we can give it the path of an image as argument. For instance, for a picture like:

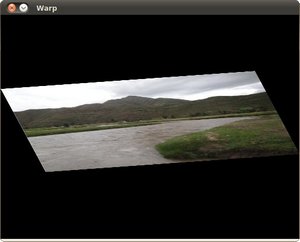
after applying the first Affine Transform we obtain:

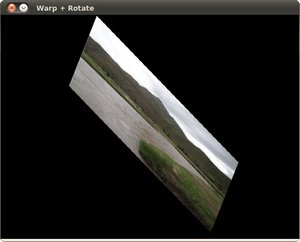
and finally, after applying a negative rotation (remember negative means clockwise) and a scale factor, we get:

 1.8.12