- Note
- We assume that by now you know how to load an image using cv::imread and to display it in a window (using cv::imshow ). Read the Load and Display an Image tutorial otherwise.
Goals
In this tutorial you will learn how to:
- Load an image using cv::imread
- Transform an image from BGR to Grayscale format by using cv::cvtColor
- Save your transformed image in a file on disk (using cv::imwrite )
Code
Here it is:
#include <opencv2/opencv.hpp>
int main( int argc, char** argv )
{
char* imageName = argv[1];
Mat image;
if( argc != 2 || !image.
data )
{
printf( " No image data \n " );
return -1;
}
Mat gray_image;
imwrite(
"../../images/Gray_Image.jpg", gray_image );
imshow(
"Gray image", gray_image );
return 0;
}
Explanation
- We begin by loading an image using cv::imread , located in the path given by imageName. For this example, assume you are loading a BGR image.
- Now we are going to convert our image from BGR to Grayscale format. OpenCV has a really nice function to do this kind of transformations: As you can see, cv::cvtColor takes as arguments:
- a source image (image)
- a destination image (gray_image), in which we will save the converted image.
- an additional parameter that indicates what kind of transformation will be performed. In this case we use COLOR_BGR2GRAY (because of cv::imread has BGR default channel order in case of color images).
- So now we have our new gray_image and want to save it on disk (otherwise it will get lost after the program ends). To save it, we will use a function analagous to cv::imread : cv::imwrite
imwrite(
"../../images/Gray_Image.jpg", gray_image );
- Finally, let's check out the images. We create two windows and use them to show the original image as well as the new one:
imshow(
"Gray image", gray_image );
- Add the waitKey(0) function call for the program to wait forever for an user key press.
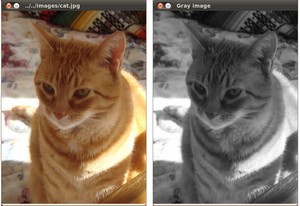
Result
When you run your program you should get something like this:
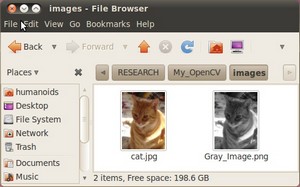
And if you check in your folder (in my case images), you should have a newly .jpg file named Gray_Image.jpg:
Congratulations, you are done with this tutorial!
 1.8.12